Lifecycle hooks are Angular method that are executed at certain point during a component’s life cycle. These methods allow you to tap into the Angular component lifecycle and apply custom logic or operations at specified point in time.
When a component is created in Angular it goes through different lifecycle phases like from being created to being destroyed.
Type Of Lifecycle Hooks:- Angular have many lifecycle hooks that allow you to inject code at directives life cycle. In Angular there are 8 lifecycle hooks.
- ngOnChanges
- ngOnInit
- ngDoChecks
- ngAfterContentInit
- ngAfterContentChecked
- ngAfterViewInit
- ngAfterViewChecked
- ngOnDestroy
NOTE:- Lifecycle hooks is nothing these are methods.
Lets explain one by one all lifecycle hooks with example.
1. ngOnChanges:- The ngOnChanges() hook is used to defect & respond to changes in input properties of an Angular component. It is called whenever there are changes to input properties. When one or more input properties of a component change. Updating your component’s state is made convenient by responding to input changes.
Here, is an example.
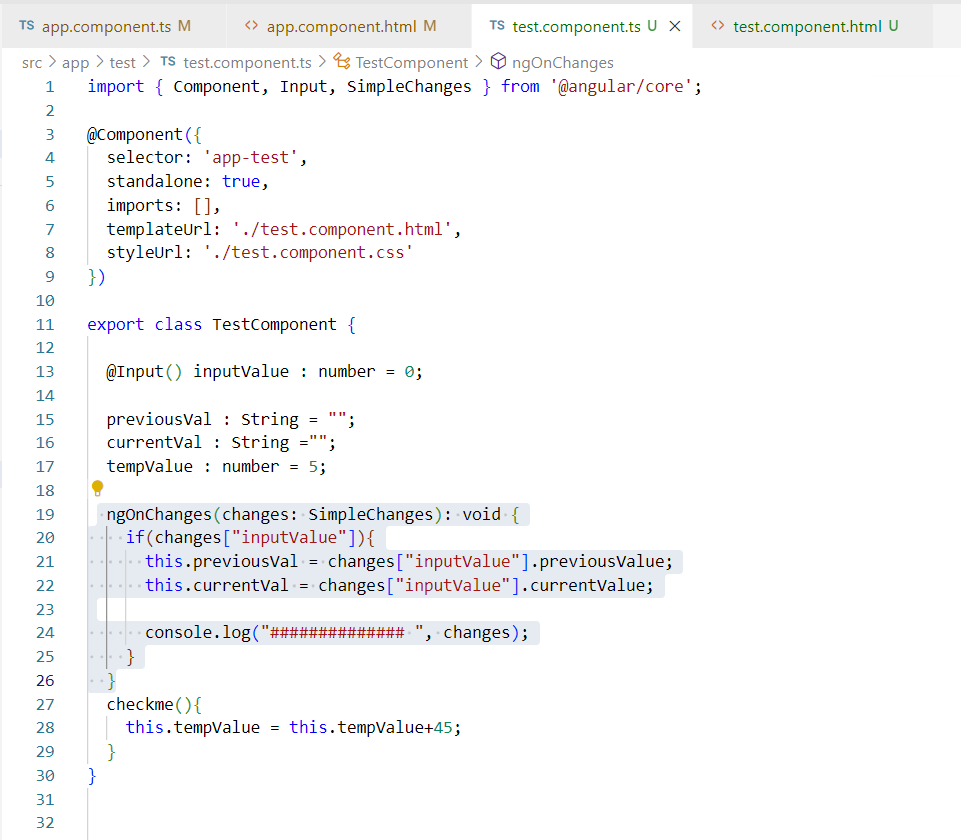
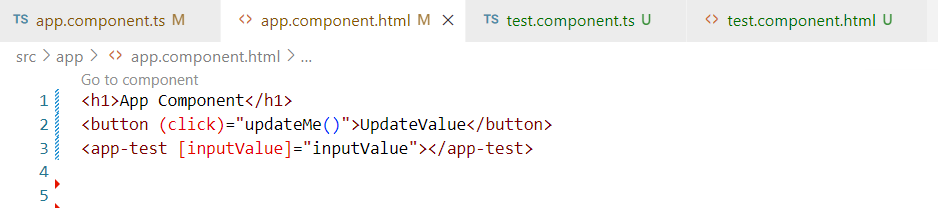
Let’s say we have a test component(child component) and an app component(as a perent component) and we define @Input() property called inputValue. Now when any value changes inside this, then ngOnChanges hook will called and inside app component we have
Let’s say we have a home component(child component) and an app component(as a parent component) and we define @Input. property called inputMessage. Now, when any value changes inside this, then ngOnChanges hook will be called. and inside app component we have
As you can see, we have simpleChange Object with properties inputValue name of @Input property, currentValue which is value coming from the app component, firstchange property set to true because it is the first change and then previousValue which is undefined.
NOTE:- To handle input changes like reading the values & updating the fields the ngOnChanges() hook comes handy.
2. ngOnInit:- The ngOnInit hook is implemented by importing the onInit interface inside the TypeScript file.
- The hook called only once during the component is initialized.
- Normally the ngOnInit() is called after the ngOnChanges() is called but when there is no template bound inputs, the ngOnInit call is made first. whenever the ngOnInit() call is made by Angular, it indicate that Angular is done creating the component & whatever initialization code is written inside ngOnInit() hook is executed at that moment.
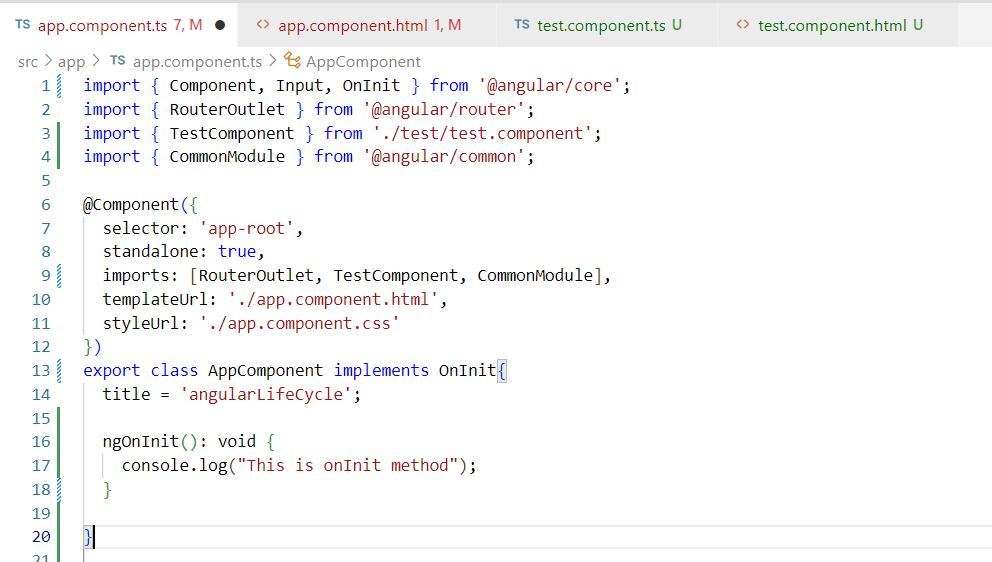
Here, we initialize the console property when the component is first created.

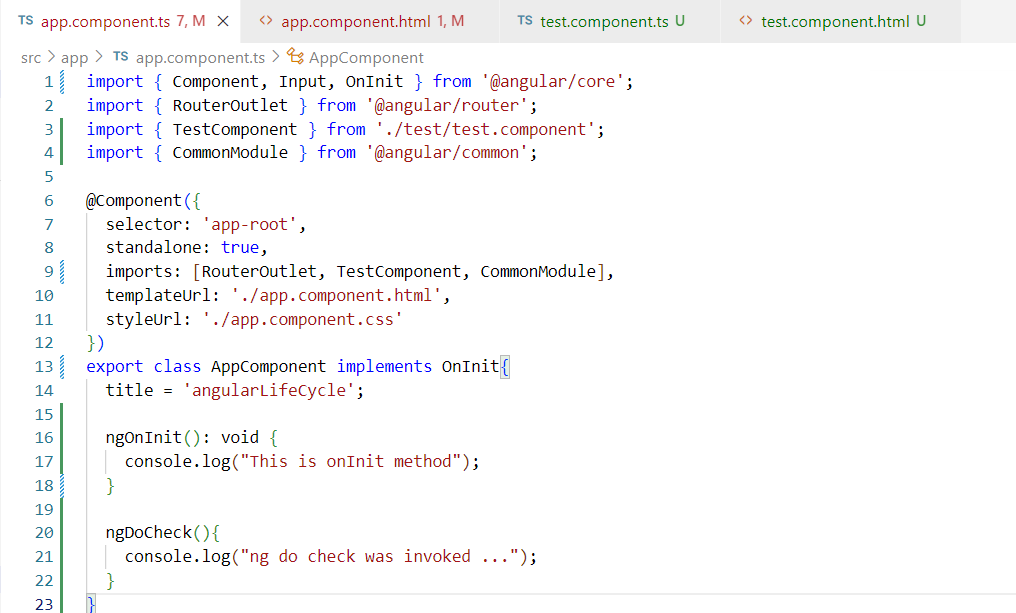
3. ngDoChecks:- The ngDoCheckes() lifecycle hooks is used for performing a custom change detection & responding to the changes in a component. It allow us to implement our own change detection algorithm for the given component.
output will given below

NOTE:- Never use the ngOnChanges() & ngDoChecks() hooks together in the same component. They are not intended to be implemented together inside the same component as it causes unwanted behavior & increase the code complexity.
Question:- What is the difference between ngDoChanges() and ngD0Checks() hook?
Answer:-
ngDoCheck():- ngDoCheck() does fire when the input property is an array/object like ABC class etc. ngDoCheck() will be called every time a change detection system detect a change.
ngOnChanges():- ngOnchanges() will be called only when a child component receives a value from parent component using @Input() decorator
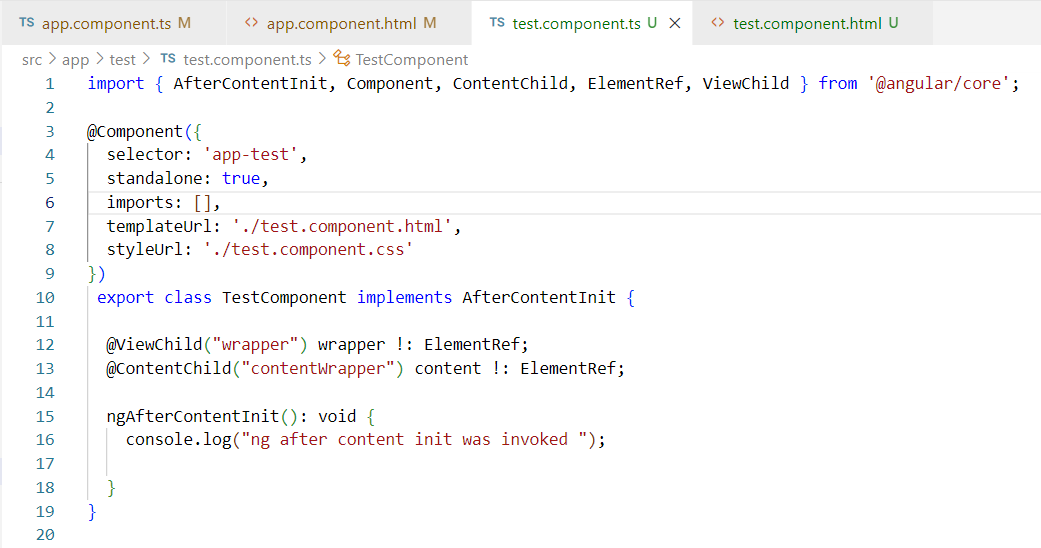
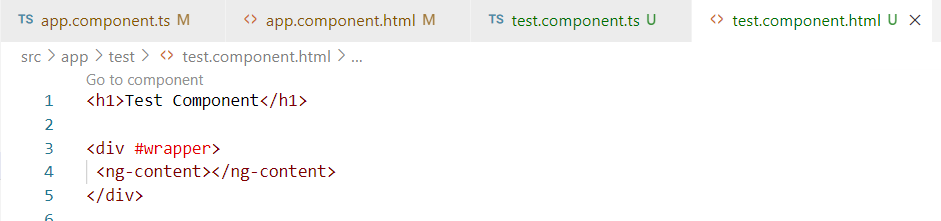
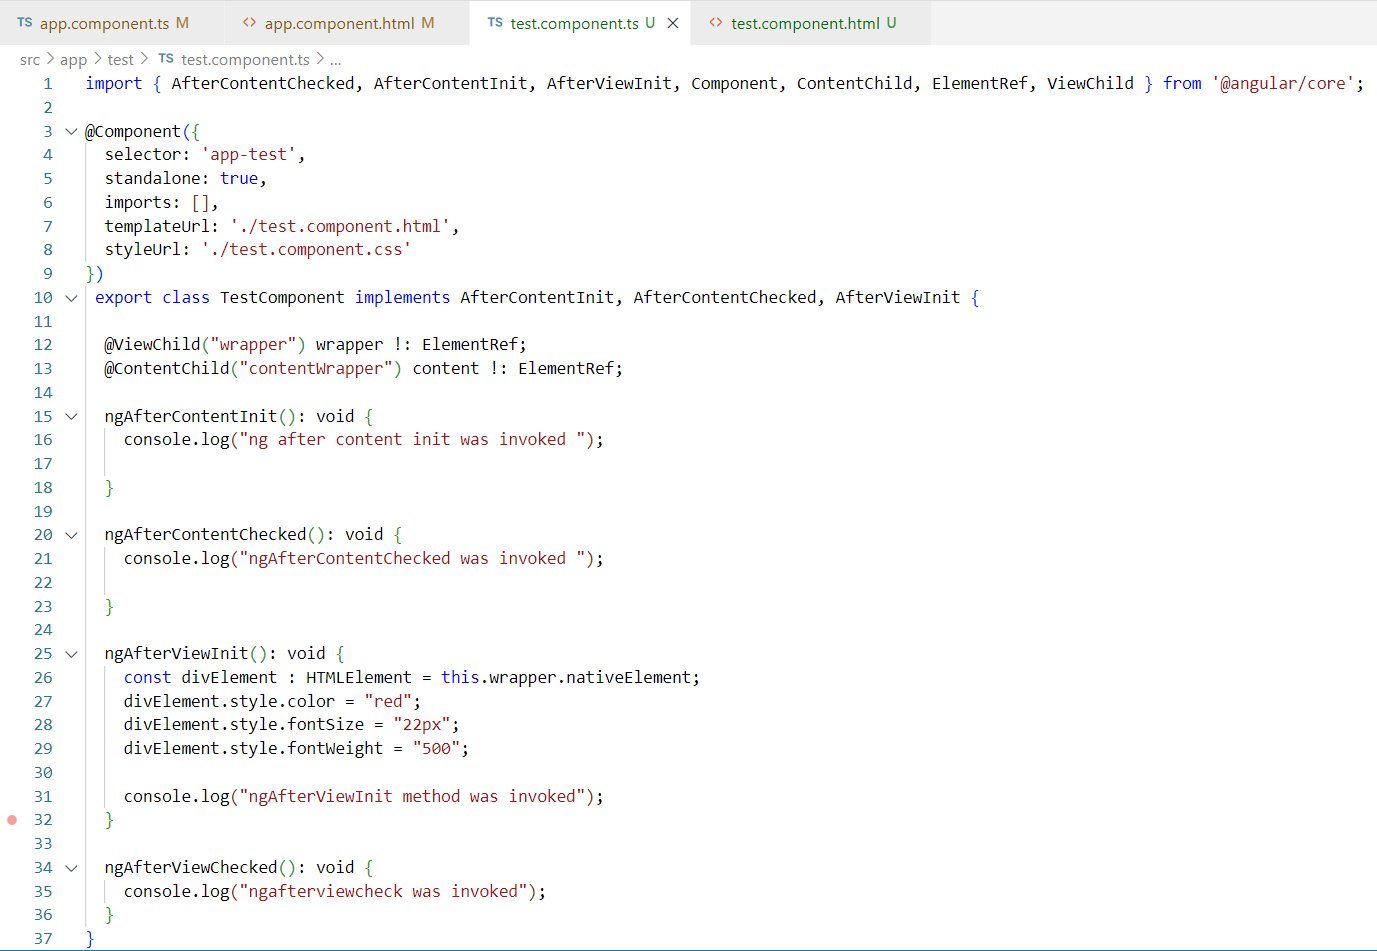
4. ngAfterContentInit:- The ngAfterContentInit() lifecycle hooks is invoked whenever there is some content projected into the component. Content that includes HTML elements or CSS or any other type of data to the child component.
Example: –

5. ngAfterContentChecked:- The ngAfterContentChecked() checks for the content of the component on every change detection cycle. The hook will get invoked each time the content of the component is checked after being projected.
Example:- same copy & paste above example and add ngAfterContentChecked() method under test.c0mponent.ts file
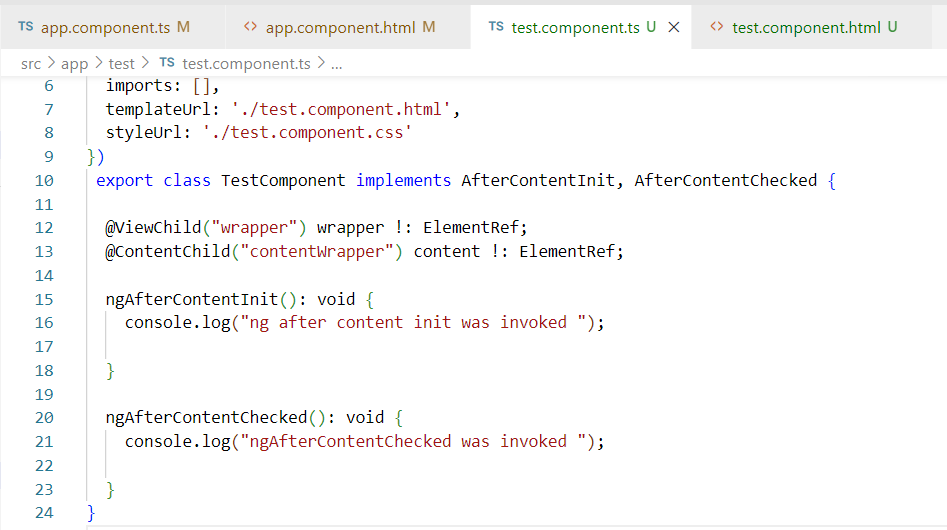
NOTE:- May be you will face performance if more requested the used the hook.
6. ngAfterViewInit:- The ngAfterViewInit() hook is called when the Angular finishes the initialization of the view in the DOM. The view has been initialized. Mostly this hook involves DOM related tasks including the child component. After the component is checked the view is initialized. The view always loads right after the content
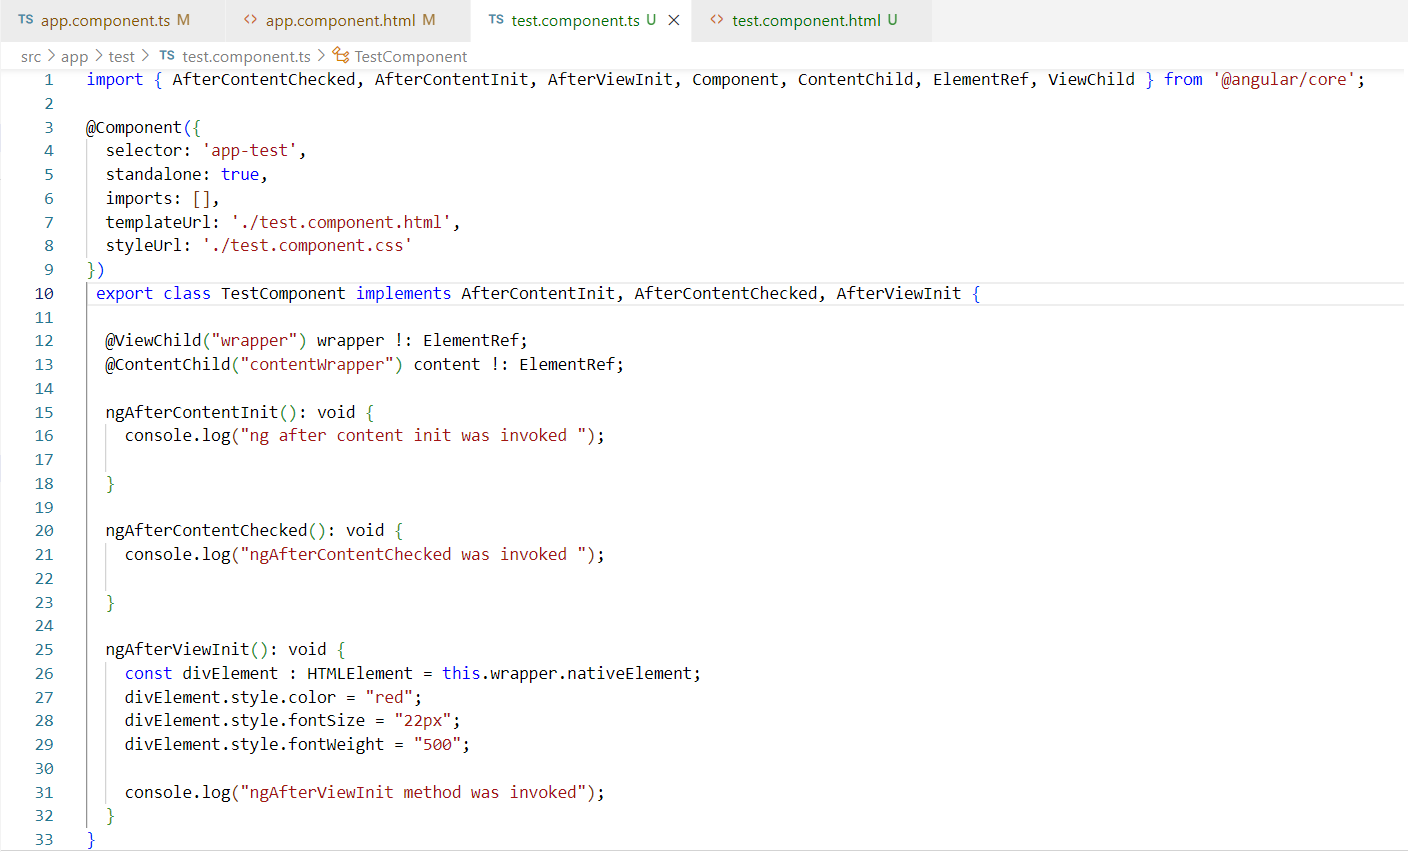
The ngAfterViewInit() hook is very handy to perform task on the view of the component.
Question:- What will be the difference if we apply the same code logic inside the ngOnInit() hook instead of ngAfterViewInit() ?
Answer:- The ngOnInit() hook will initialize the component when it gets fully rendered, that does not apply on view getting fully rendered. So this might not give the appropriate result. But ngAfterViewInit() it is guaranteed that the DOM elements are initialized & fully rendered.
NOTE:- When dealing with the DOM element manipulating task it is recommended to use ngAfterViewInit() is place of ngOnInit().
7. ngAfterViewChecked:- Angular fires the ngAfterViewChecked() hook after the component’s view & the child views. When angular is done with checking all the views, it invokes ngAfterViewChecked() hook along with every change detection cycle after the view is initialized.
8. ngOnDestroy:- The ngOnDestroy() hook is called only once during the components lifecycle, right before the component gets destroyed.
Example: –
- Removal the local storage information
- Stop timers
- Task that prevent the memory leaks etc.
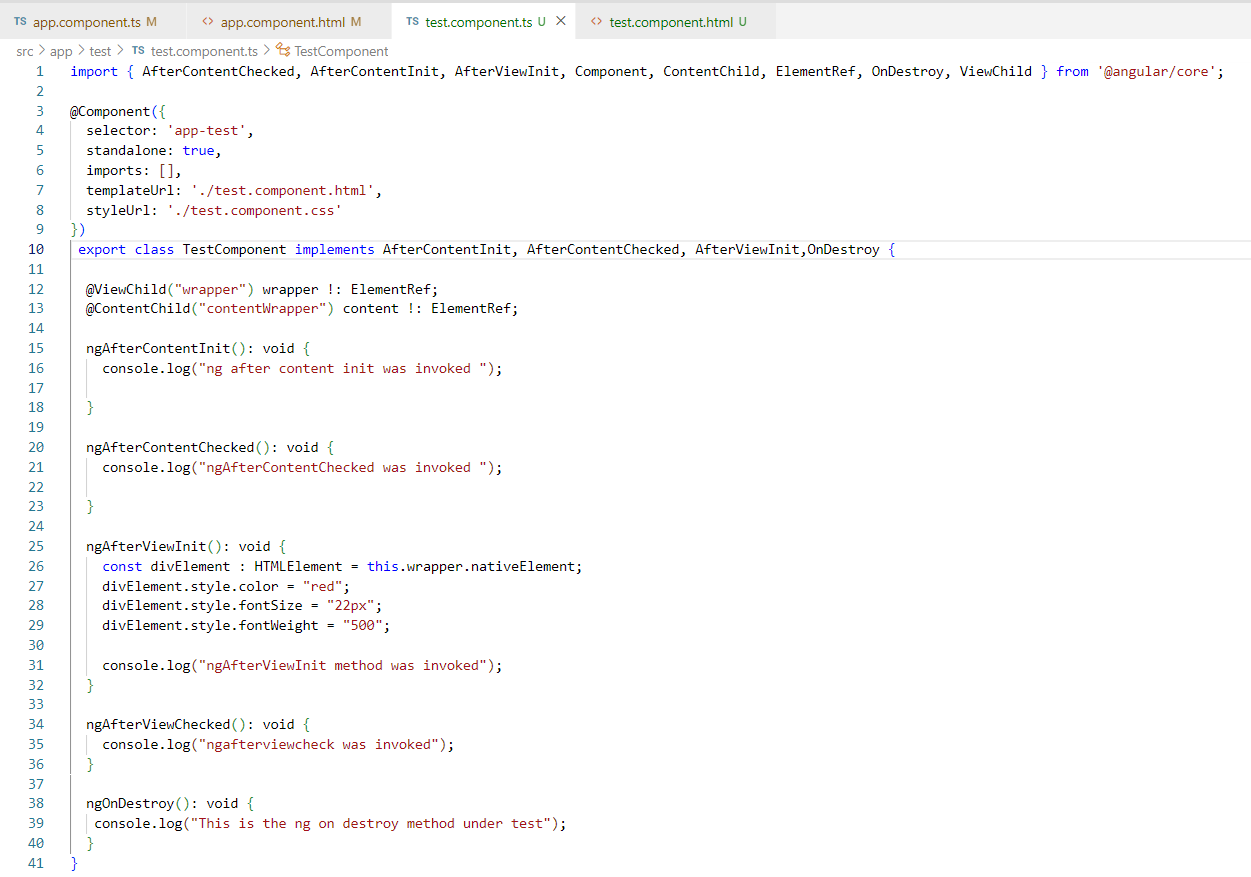
NOTE:- The ngOnDestroy() is not called when the user refreshes the page or close the browser.
That’s All.